Pages

10.27.2008

Daring Bakers: Pizza Challenge

If there is one thing I have learned from the last two Daring Bakers monthly challenges, it is this: when working with yeast, always remove your rings and wash hands thoroughly before putting them back on. Both times I remembered this too late, put on a yeast/dough-packed wedding ring, and watched as my finger broke out, turning all red and scaly. However, that is not really appetizing...so, let's move on to the October challenge: Pizza! This month's challenge was chosen by Rosa of Rosa’s Yummy Yums. Thanks!

Not only did we have to make our own pizza dough, which is not new to us, put we also had to toss it. Here are the pics:


While it appears I have hung the dough from the ceiling fan, I assure you that did not happen. Things go much smoother in the Vanilla Bean Kitchen. We run a pretty tight ship here.

We made a Radicchio, Shrimp and Fontina pizza and a Sun-Dried Tomato, Black Olive and Goat Cheese pizza. Both were awesome. This is a great pizza dough recipe. While it sucks it is a two-day recipe, it did make 6 pizza crusts. So, we have 4 more in the freezer just waiting to be used.

Something to note about cooking your pizza: we didn't have a peel to transfer the dough to the pizza stone we had heating in the oven. So, we used the back of a jelly roll pan (as it explains in the recipe). That worked just as well.

Sun-Dried Tomoato, Black Olive and Goat Cheese
(I just winged it...so measurments aren't exact)


Drizzle basic pizza dough crust (recipe below) with olive oil. Sprinkle on crumbled goat cheese, chopped sun-dried tomatoes, chopped black olives, and 2 cloves roasted garlic, chopped. Toss on some dried basil and oregano for more flavor.


Radicchio, Shrimp and Fontina Pizza
from The Little Guides: Pizza

basic pizza dough crust (see recipe below)
6 cloves of roasted garlic, chopped
Olive Oil, to cover
10-12 large shrimp
1 tbls. evoo
1/4 head radicchio, chopped
1 1/2 tbls. finely chopped basil
4-5 oz. Fontina cheese


We didn't think the 7-8 min. in the oven as directed in the basic pizza dough recipe would be enough to cook the shrimp. So, we cooked them slightly before putting them on the pizza. Scatter the radicchio, garlic and basil over the dough. Top evenly with cheese and finally the shrimp. Season to taste with salt and pepper and drizzle with a little evoo.


BASIC PIZZA DOUGH
From “The Bread Baker’s Apprentice” by Peter Reinhart
Makes 6 pizza crusts (about 9-12 inches/23-30 cm in diameter)

Ingredients:
4 1/2 Cups (20 1/4 ounces/607.5 g) Unbleached high-gluten (%14) bread flour or all purpose flour, chilled
3/4 Tsp Salt
1 Tsp Instant yeast
1 3/4 Cups (14 ounces/420g or 420ml) Water, ice cold (40° F/4.5° C)
1 Tb sugar

DAY ONE
1. Mix together the flour, salt and instant yeast in a big bowl (or in the bowl of your stand mixer).
2. Add the oil, sugar and cold water and mix well (with the help of a large wooden spoon or with the paddle attachment, on low speed) in order to form a sticky ball of dough. On a clean surface, knead for about 5-7 minutes, until the dough is smooth and the ingredients are homogeneously distributed. If it is too wet, add a little flour (not too much, though) and if it is too dry add 1 or 2 teaspoons extra water. NOTE: If you are using an electric mixer, switch to the dough hook and mix on medium speed for the same amount of time.The dough should clear the sides of the bowl but stick to the bottom of the bowl. If the dough is too wet, sprinkle in a little more flour, so that it clears the sides. If, on the contrary, it clears the bottom of the bowl, dribble in a teaspoon or two of cold water.The finished dough should be springy, elastic, and sticky, not just tacky, and register 50°-55° F/10°-13° C.

3. Flour a work surface or counter. Line a jelly pan with baking paper/parchment. Lightly oil the paper.

4. With the help of a metal or plastic dough scraper, cut the dough into 6 equal pieces (or larger if you want to make larger pizzas).NOTE: To avoid the dough from sticking to the scraper, dip the scraper into water between cuts.

5. Sprinkle some flour over the dough. Make sure your hands are dry and then flour them. Gently round each piece into a ball.NOTE: If the dough sticks to your hands, then dip your hands into the flour again.

6. Transfer the dough balls to the lined jelly pan and mist them generously with spray oil. Slip the pan into plastic bag or enclose in plastic food wrap.

7. Put the pan into the refrigerator and let the dough rest overnight or for up to three days. NOTE: You can store the dough balls in a zippered freezer bag if you want to save some of the dough for any future baking. In that case, pour some oil(a few tablespoons only) in a medium bowl and dip each dough ball into the oil, so that it is completely covered in oil. Then put each ball into a separate bag. Store the bags in the freezer for no longer than 3 months. The day before you plan to make pizza, remember to transfer the dough balls from the freezer to the refrigerator.

DAY TWO
8. On the day you plan to eat pizza, exactly 2 hours before you make it, remove the desired number of dough balls from the refrigerator. Dust the counter with flour and spray lightly with oil. Place the dough balls on a floured surface and sprinkle them with flour. Dust your hands with flour and delicately press the dough into disks about 1/2 inch/1.3 cm thick and 5 inches/12.7 cm in diameter. Sprinkle with flour and mist with oil. Loosely cover the dough rounds with plastic wrap and then allow to rest for 2 hours.

9. At least 45 minutes before making the pizza, place a baking stone on the lower third of the oven. Preheat the oven as hot as possible (500° F/260° C). NOTE: If you do not have a baking stone, then use the back of a jelly pan. Do not preheat the pan.

10. Generously sprinkle the back of a jelly pan with semolina/durum flour or cornmeal. Flour your hands (palms, backs and knuckles). Take 1 piece of dough by lifting it with a pastry scraper. Lay the dough across your fists in a very delicate way and carefully stretch it by bouncing it in a circular motion on your hands, and by giving it a little stretch with each bounce. Once the dough has expanded outward, move to a full toss.

11. When the dough has the shape you want (about 9-12 inches/23-30 cm in diameter - for a 6 ounces/180g piece of dough), place it on the back of the jelly pan, making sure there is enough semolina/durum flour or cornmeal to allow it to slide and not stick to the pan.

12. Lightly top it with sweet or savory toppings of your choice.

13. Slide the garnished pizza onto the stone in the oven or bake directly on the jelly pan. Close the door and bake for about 5-8 minutes.

14. Take the pizza out of the oven and transfer it to a cutting board or your plate. In order to allow the cheese to set a little, wait 3-5 minutes before slicing or serving.

Check out the other Daring Bakers at http://daringbakersblogroll.blogspot.com/

TWD: Chocolate-Chocolate Cupcakes

I made these cupcakes at the beginning of the month for my friend's 30th birthday, with the intention of making them again as Halloween cupcakes. But, time got the best of me and I only made them once. The recipe this week was chosen by Clara at iheartfood4thought and you can find the recipe there. Thanks!! Also, check out the Tuesdays With Dorie blog to see all the other cupcakes.

I made two different frostings. One was the glaze Dorie recommended and the other was a cream cheese frosting. I didn't like Dorie's glaze at all...I can't stand the taste of bittersweet chocolate. She also used bittersweet in the cupcake recipe. Next time, I will use semisweet.

Overall, the cupcakes were not bad. I thought they were moist and I was impressed that the next day they were still moist.

To make them birthday cupcakes, I made little 30s to go on the top using Vanilla Candy Wafers. Here is what I did. First draw the numbers on a piece of parchment paper.


Melt the wafers according to the directions on the package, put in a plastic baggie, and cut a small hole in the tip. On the back side of the parchment paper, trace the numbers and fill them in.


Place in the freezer to harden. And...voila! You have perfect cupcake toppers. And, they are tasty to boot!


10.18.2008

Stuffed Rack of Lamb for Two

Each year for our birthdays, we try to cook something we have never tried before, or in the very least, strays from the typical weeknight meals. During the first couple of birthdays we were together, the meal was a total surprise to the birthday boy/girl. Now, however, we usually keep the menu a secret up until a couple days before the big day and make the meal together. Often these recipes make it into our regular cooking rotation. Past birthday meals have included seafood risotto, lobster, mini beef wellingtons, chocolate mousse, and stuffed rack of lamb.

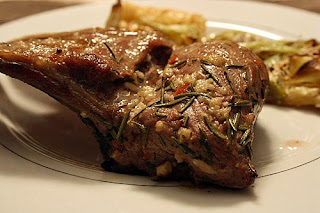
I liked this recipe because it used so many Greek flavors. The first time we madeit, I got the lamb from Whole Foods for about $20-24. During a recent trip to Costco, however, they had it for $18. So, check their first if you are a member. The recipe below is the original as found on The Food Network's website. We made it by the book for Jeff's birthday last February and it was delicious. The second time we make it, I forgot to pick up some olives. But, no worries...we went ahead with it anyway and it still tasted great.


Stuffed Rack of Lamb for Two
from The Food Network


Ingredients
For the Marinade:
1/2 lemon
1/4 cup extra-virgin olive oil
2 cloves garlic, chopped
1 tablespoon freshly chopped rosemary leaves, plus sprigs for garnish
1/2 teaspoon salt
1/2 teaspoon fresh cracked pepper

For the stuffing:
1/2 cup crumbled feta cheese
1/4 cup sun-dried tomatoes packed in oil, chopped
1/4 cup kalamata olives, pitted and coarsely chopped
2 tablespoons chopped flat-leaf parsley
1/2 teaspoon freshly cracked pepper
1 rack of lamb (about 8 chops)

Directions
To make the Marinade:
Zest the lemon with a fine grater, taking care to only remove the yellow peel—the white pith beneath it is bitter. Use the lemon juice for cocktails, or splash a bit into the marinade if you really love citrus. Mix all the marinade ingredients together.


To make the Stuffing: Mix the stuffing ingredients together.


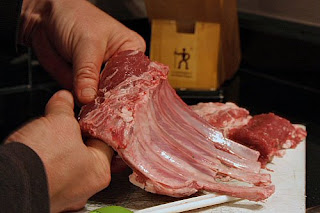
To prepare the Lamb: Cut the rack in 1/2 crosswise so that each piece contains 4 chops. Insert a long, skinny knife into one end of the meat and push it through until the tip emerges from the other end. Then, remove the knife and use the handle of a wooden spoon to ream out a 1/2-inch hole, forming a tube through the 4 chops. With your fingers, press half the stuffing into the rack, making sure it's distributed evenly. Repeat with the other half of lamb.


Place the lamb in a zipper baggie, spoon the marinade onto the meat, and rub it in a little bit. Marinate for at least 1 hour, preferably 4 hours.


Preheat the oven to 425 degrees F. Roast the chops for 25 minutes for medium rare, or until an instant-read thermometer inserted into the thickest part of the meat registers 10 minutes (during which they continue cooking, and the juices run back to the center). Slice into individual chops, if you like, fan across the plate, garnish with a rosemary sprig, and serve.

Before we made this, I was always a little intimidated by lamb and thought it would be very expensive. This recipe is so easy and the price is great for a special-occasion meal. You would pay alot more for this in any restaurant!

Leek Tart


I love cooking with leeks. A part of the onion family, they are a milder, sweeter version. This recipe makes for a great quick and easy appetizer. We had this as a side to Stuffed Rack of Lamb for Two (recipe coming soon).

When cooking with leeks, make sure to thoroughly clean them out. Dirt hides in the many layers. Soak them in water first for about 10 min. Cut them and run the slices under running water.

Leek Tart
recipe from Everyday Food

all purpose flour for work surface
1 sheet store bought puff pastry, thawed
2 tbls. butter
2 leeks, halved lengthwise and thinly sliced crosswise, rinsed well
coarse salt and ground pepper

1. Preheat oven to 375 degrees. On a lightly floured work surface, roll out pastry. Transfer to a baking sheet lined with parchment paper.

2. With a paring knife, lightly score the pastry 1/2 inch from edges, creating a border; prick pastry inside border all over with a fork. Refrigerate for 15 min., then bake until golden brown, 18-20 min.

3. Meanwhile, in a skillet, heat butter over medium. Add leeks; season with salt and pepper, and stir. Cover, cook until wilted, about 5 min. Uncover; cook until tender, 10-12 min. Spoon leeks onto crust, cut into wedges and serve.

We grated some fresh Parmesan on top to add another layer of flavor.

10.13.2008

TWD: The Great Biscotti Debacle

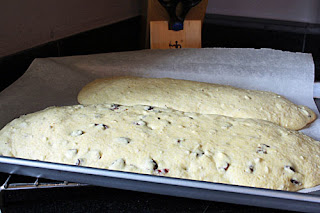
Well, Dorie, we all can't have a good day in the kitchen, I guess. This week's Tuesdays with Dorie challenge was biscotti. Mine didn't turn out, plain and simple. It never really formed a ball. This is what the dough looked like after the first 15 min. in the oven. I think I should have left it in longer. From here, Dorie said to cut them into smaller pieces and stand them like a marching band on the cookie sheet and bake longer. I don't know what she was smoking...but there was no way that was going to happen with my dough. For the recipe, visit Gretchen at Canela & Comino.


In the end, this is what I had. They are actually very tasty and very cookie-like. Not as hard as typical biscotti. The recipe itself is great....I just need to try it again. You can see I added dried cranberries and chopped almonds. Check out the link to TWD above to see some successful TWD bakers!


10.12.2008

What am I supposed to do with all this paella?

GEORGE: Ok, fine. It's going to be very interesting, very interesting if they don't show up tonight. You know my mother made all this Paella.

JERRY: What is that anyway?

GEORGE: It's a Spanish dish. It's a mélange of fish, an meat with rice. Very tasty.


I've started to notice that whenever someone asks me what I am doing for the weekend or what I did over the weekend, I often respond with what we plan on cooking or what we cooked. Cooking a meal together is like a date night for us and one of our favorite dishes to make is paella. After having it at our favorite tapas restaurant, Modesto, and then watching a live paella cooking demo in Mexico, we knew we had to give it a try.

Probably the most important thing to do first when making paella is to make the sangria. It took us 2 hours to make our paella dish...so, you'll need something to sip on. I opted for white sangria. This was adapted from a Martha Stewart recipe. Martha rocks.


White Sangria
In a pitcher, dissolve 1/4 cup sugar in a 1/4 cup brandy. Slice 1-2 peaches. Pour in one bottle of Sauvignon Blanc or Pinot Grigio. I used this one by Bogle. Add peaches. Before you serve, add 1 1/2 cups of club soda. Serve over ice. This stuff is awesome. You might want to double the recipe.

Next, you'll need a paella pan. I got ours from Paellapans.com. We have the 14" carbon steel pan, which serves 2 to 4 people. You can probably also find them at World Market.

The recipe we used is also from Paellapans.com. We usually make a seafood paella and this was the first time we went with only chicken and smoked sausage. Also, a tip on where to get saffron. I get it at World Market...for whatever reason, it is much cheaper there than at the local grocery store.

Paella with Chicken and Smoked Sausage
Serves four (ideal for 1 13 or 14-inch pan)
Adapted from paellapans.com

3 cups chicken stock; (we have learned to make 6 cups, just to be on the safe side)
Pinch of saffron threads, toasted and steeped in 1/2 cup hot stock
Salt to taste
1/4 cup extra-virgin olive oil
4 skinless chicken thighs, chopped in halves and seasoned with salt and pepper
1-2 smoked sausages, sliced
1 red pepper and 1 yellow pepper, cored, seeded, and cut in 1-inch wide strips
6 medium garlic cloves, peeled and minced
Grape tomatoes
1/2 medium onion, grated on the largest holes of a box grater
1 ripe tomato, halved horizontally and grated on the largest holes of a box grater (discard the skin)
1 1/2 cups medium grain rice
1 lemon, cut in wedges for garnish

In a saucepan, bring the stock to a boil; lower to a simmer. Add the saffron-infused liquid. Taste; the stock should be well-seasoned, so add salt if necessary. Let simmer until ready to add to the rice. Cut up the sausage and peppers.

Set a paella pan (14-inch diameter) over medium high heat with the olive oil, noticing if the pan sits level. If not, choose another burner or try to create a level surface. When the oil is hot, sauté the chicken pieces until golden and cooked through, 10 to 15 min. Transfer the chicken to a platter and set aside.


Reduce the heat to medium low. In the paella pan, sauté sausage.


Transfer the sausage to a plate. If there is more than 1 Tbs. of olive oil in the pan, pour out the excess. Increase the heat to medium and sauté the onion until soft, about 5 min. Toss in the garlic, too.

Add the tomato and season well with salt, and sauté until the water from the tomato has cooked out and the mixture has darkened to a burgundy color and is a very thick purée, 10 to 15 min. (This tomato-onion-garlic mixture, called the sofrito, is the flavor base for the paella.)

On medium high heat, add the rice, stirring until it's translucent, 1 to 2 min. Stir or shake the pan to evenly distribute the rice.

Pour in about 2 cups of the simmering stock.

As the stock comes to a boil, lay the chicken pieces on top. Do not stir the rice once the water is boiling. Cook on medium high, rotating and moving the pan over one and two burners to distribute the heat and cook the rice as evenly as possible. When the rice begins to appear above the liquid, after 8 to 10 min., reduce the heat to medium low.


Continue to simmer, rotating the pan as necessary, until the liquid has been absorbed, about 10 min. more. Add the sausage. Taste a grain just below the top layer of rice; it should be al dente, with a tiny white dot in the center. (If the rice is not done but all the liquid has been absorbed, add a bit more hot stock or water to the pan and cook a few minutes more.)

Add the sliced peppers and grape tomatoes. Cover the pan with aluminum foil and cook gently for another 2 min. to help ensure that the top layer of rice is evenly cooked. With the foil still in place, increase the heat to medium-high and, rotating the pan, cook for about 2 min., until the bottom layer of rice starts to caramelize, creating the socarrat. The rice may crackle somewhat, but if it starts burning, remove the pan from the heat immediately.


Let the paella rest off the heat, still covered, for 5 min. Sit everyone down at a round or square table. Remove the foil and invite people to eat directly from the pan, starting at the perimeter, working toward the center, and squeezing lemon over their section, if they want.


Sit down with a glass of sangria and enjoy! Since it probably took you most of the night to prepare, hopefully you still have a couple glasses left!

10.06.2008

TWD: Caramel-Peanut Topped Brownie Cake


This is the first Tuesdays with Dorie recipe that earned me a "You're a superstar" from my husband! Not bad for it being the fourth TWD recipe I've made.

I made a couple of changes to Dorie's recipe. First, I split it in half. Second, I used semi-sweet chocolate instead of bittersweet. I don't like the taste of bittersweet and in the back of Dorie's book, she says the two can be used interchangeably. I don't think either change had any impact on the recipe. Although, I didn't bake my cake for as long as she directed.

This was also the first time I've made caramel. I was beginning to think it wouldn't turn the deep amber color she said it would, but it did very quickly. So, keep your eye on it!

Tammy from Wee Treats by Tammy was the host of this week's challenge. If you want the recipe, please visit her blog. Also, to see all the other TWD bakers, check out Tuesdays with Dorie.

Chicken Spedini

At least once a year, Jeff and I try to get away to Lake Villas Resort at Lake of the Ozarks. Each suite has its own kitchen, sitting room with fireplace, jacuzzi tub, and large deck overlooking the lake. We always plan out our menu ahead of time and try to make meals we've never made before. We are going there this year for Thanksgiving and I'm already dreaming about what we can make. It is also conveniently located near the Coach Outlet. But, that really has no impact on my wanting to stay there.

This recipe is from the first trip we took to this resort. I think it originally came from the Food Network website. Watch the salt in this recipe. Using Italian breadcrumbs with the prosciutto makes this recipe pretty salty. I always have to remind Jeff to hold back on seasoning the chicken.

Chicken Spedini

4 large boneless chicken breasts
4 slices of provolone
4 slices of prosciutto
4 bay leaves

Clean and dry chicken. Place in freezer for about 8 minutes. Remove chicken, lay flat and slice parallel to the cutting board, opening them up. Using a meat mallet or bottom of a heavy glass, pound gently each slice to where it is thin. Salt and pepper each slice and set aside.

In a bowl, mix:
1 cup seasoned bread crumbs
1/2 cup parmigiano cheese
1/2 cup olive oil
1/8 cup fresh chopped parsley
2 cloves garlic, minced
1/4 cup finely chopped onions
salt and pepper

If you have to, add a little extra olive oil to make moist, but not soaked. Lay out a slice of the chicken and place a dollop of the mixture, spread and press down with fingers. Add a piece of provolone cheese and a slice of prosciutto in the center.


Roll up chicken and put a bay leaf on the top. You might need to stick a couple of toothpicks through the chicken to keep it rolled. Place each in an olive oiled baking dish and sprinkle leftover mixture on top.


Cover and bake at 325 degrees for 60 minutes. Uncover and bake at 300 degrees for 10 minutes more. Serve with fresh parsley and a slice of lemon.


10.05.2008

Spicy Marinated Eye of Round


We use the slow-cooker a couple times a month, often doing the same thing. I decided to change things up and used this recipe. Overall, this was not as spicy as the name would lead you to believe. Next time, we would probably leave out the nutmeg and the cloves and bump up the hot sauce.

Spicy Marinated Eye of Round
Southern Living Slow-Cooker Cookbook

1 (3-5) pound eye of round roast
1/2 tsp salt
1/4 tsp pepper
1 sweet onion, sliced
Spicy Sauce (see recipe below)

Spicy Sauce
2 cups ketchup
2 cups water
1/3 cup red wine vinegar
1/4 cup firmly packed brown sugar
2 tbls Worcestershire sauce
1 tsp dry mustard
1 tsp dried oregano
1 tsp pepper
1/2 tsp garlic powder
1/2 tsp chili powder
1/2 tsp ground cloves
1/4 tsp ground nutmeg
1/4 tsp hot sauce
1 bay leaf

1. Cut roast in half, and sprinkle with salt and pepper. Place roast and onion in a 5-quart slow cooker. Stir together ingredients for Spicy Sauce, and pour mixture over uncooked roast.

2. Cover and cook on high for 9 hours.

3. Remove roast; cool slightly, and shred roast. Return to sauce in slow cooker.

I served this over garlic toast with cornbread muffins on the side. I made the muffins quick and dirty: a box of corn bread mix and I tossed in about a cup of shredded cheddar cheese to add a bit more flavor.