Showing posts with label Kitchen. Show all posts

2.24.2010

Flash of Inspiration

Last night as I was recovering from Lost (sometimes you just have to concentrate so much on the episode...and I find it even harder after I've had a couple glasses of wine) I had a flash of inspiration. Back in October, we put up a shelf in our breakfast nook. I wasn't quite happy with it then, but haven't been able to come up with a solution. Until now.

A few readers thought I should add another shelf. But, I don't think there really is enough room...I'm afraid we would bump into it. Starfish would break. My precious Bobby Flay cookbook would be on the floor. It would be devastating.

It really was a flash of inspiration. From the couch, I whirled my head around and stared at the wall. Mr. VB said, "Uh-oh...what are you thinking?"

Board and batten, I said.

I remembered seeing this post at It's The Little Things. I love her beachy/cottage style. About a year ago, Karla did a how-to board and batten post. This would be perfect for my breakfast room! It would add dimension to the walls, without causing any harm to my dear Bobby! Or my starfish. We had already decided to put a chair rail in our dining room. Instead, we could use this technique (at chair rail height) and bring it around into the breakfast area.

What do you think?


10.09.2009

No Turning Back Now!

What's done is done. The Housewarming Party evites went out and we have alot to do before the 25th! Our main objective will be making some big improvements in the kitchen, in addition to putting some final touches in the breakfast area and living room. Here's the list we are working on: 

1. Paint the cabinets white
2. Add new pulls
3. Update with stainless steel appliances (stove and refridgerator)
4. Put beadboard on the island
5. Spruce up the dishwasher until we can put in a stainless one

Our goal is to turn this:


Into this:


I love the stainless steel farmer's sink (might be a little pricey, though). The countertops and backsplash are in the next phase of the project. We are thinking of tiles similar to these (not all the way up to the ceiling, though) and removing the wall cabinets and putting up shelves.

Here are some more kitchens I'm using for inspiration:


Keep your fingers crossed and hopefully I'll have some pics to show on Monday!

10.07.2009

Breakfast Nook Wall -- Help!


Things are just about wrapped up in the breakfast area. I just feel that the back wall is missing something. I asked Jeff to build me a shelf to hold some cookbooks. Here is what I had in mind:


Jeff thought more than one shelf would get in the way, so this is what we came up with:


Anyone out there have any thoughts or inspiration to send my way? It still feels a little bare!! Help!


9.24.2009

Breakfast Room Updates

We are almost done with the Vanilla Bean breakfast room. I am hoping that by this time next week, I'll have a new place to eat my Wheaties. Just kidding. I don't eat Wheaties. I'm a Frosted Mini-Spooners girl.

Table & Chairs Before


Chairs During


After


The process: The chairs were first sanded down and got about 3 layers of white paint. I distressed the edges with my palm sander and then went back over the exposed wood with a Q-tip dipped in dark wood stain (I wiped it off soon after it was applied). It really brought out the distressing detail.

The table was a bit more work. When we first brought the table home, we discovered it was too short and we couldn't get out legs under when sitting down. So, if you look closely at the bottom of the legs, you will see how we heightened the table (by we, I mean Jeff). He did a great job blending it all in and you can't even tell!

I didn't sand off the exisiting green paint. Just painted on about 3 coats and used the same techniques as I did on the chairs.


Also, it's DIY Day at A Soft Place to Land...check it out for more projects!

9.23.2009

The Secret Life of a Cushion

We all do it. You know you do. You say you just want to update the look of your dining room. Maybe add a little color to your breakfast nook. So, you head on down the the local fabric store and pick up a couple of yards. Maybe you'll go with a bold pattern this time. Or, get in on the burlap craze.

I'm talking about recovering a chair cushion. An easy, affordable way to change the look of your chairs. Some of us are able to control this urge. Then, there are others that need an intervention.

With this in mind, I give you Exhibit A:


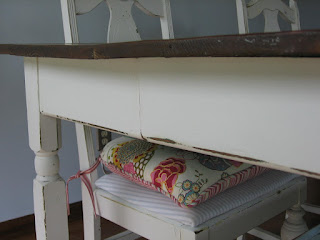
Looks harmless, right? Four of these chairs were given to us. I liked the curves of the legs and back and thought they would be great in our breakfast room. I got most of the paint sanded off. Repainted them. Distressed them. Then, it was time to work on that seat cover. My plan was to strip down the seat cushion, put a simple piece of fabric on it, and buy a couple of cushions to put on top of that. I picked up some super cute ones at Pier One (this is the pattern...the shape of mine are a bit different).
First up, stripping off that brown fabric. That was easier said than done.

Which brings me to Exhibit B:


You might find it difficult to see the many layers of this seat. So, let me break it down for you.


And, it doesn't stop there. I got down to the "last layer", layer 6. A sweet, light blue striped fabric that goes perfectly with our walls and the cushions I picked for the chairs. But, upon further inspection (I didn't want to rip the striped fabric) I noticed there were at least three more layers. Possibly a fourth. For a grand total of 10 layers of fabric. And approximately 10 thousand staples.

Because the gifter of these chairs thought there were only two layers of fabric, an intervention in this case is clearly beyond my control. Clearly, someone before her had an addiction to recovering chairs. What gets me the most is, why, after 10 transformation was it decided that these chairs should be given up on? What was it that caused this person to toss them aside? Perhaps purchase new ones? I will never know. But, as they say, one person's trash is another's treasure!


9.21.2009

September Staycation

Four days ago I started a glorious staycation. When I am not busy slaving away in the Vanilla Bean Kitchen & house, I am a special events manager for a nonprofit in St. Louis. I have some down time until the next big fundraiser, so I decided to take a few days off and try to finish some of the gazillion projects I am working on. Or, in the very least, start a few new ones.

Here are a few of the things I am working on:


I picked up the above window pane at an antique store for $20. I thought it would be the perfect opportunity to jump on the chalkboard bandwagon.

The green farmer's table below was purchased at the same antique store. I've been looking all over for a farmer's table, but couldn't seem to find one for under $250. This little guy was $150. He just needs a paint job to blend in a little more. The bench will go on one side (it just happens to look great w/ the Dockside Haze paint we picked for the kitchen).

On the other side will be two of these chairs we got from my mother-in-law. I'm almost done w/ one and cannot wait to show you the pics.


Last, but certainly not least, is the little sidetable I picked up below. At first glance it looks ordinary...but wait until you see what I found inside...


9.08.2009

A Room with a View

When you are looking for a house, you have your list of "must haves" and "willing to sacrifice." I was willing to negotiate on the number of bedrooms if the basement was finished. Because our dogs love to run...away, a fenced yard was at the top of our list. Vaulted ceilings would be nice. One of the biggest musts was an open living room and kitchen area. Or, at least an area that could be made more open. I'm not afraid to do a little work, if needed. That's what I have Jeff for, anyway.

First, we took down the hanging cabinets.


Eventually, we will add some hanging pendants here. Next, we addressed the ugly florescent light fixture above the kitchen island.


We wanted a hanging pot rack w/ lighting, so it wouldn't be so dark above the island. We found exactly what we were looking for at Lowes. Also, it made up for some of the cabinet space we lost by taking down the hanging cabinets.


Our next major project is painting. We started with the fireplace, which had mostly red bricks. Painting a fireplace is one of my least favorite jobs. The rolling. The jabbing the brush into the lines and bricks....my arm is still sore.


Our first attempt was at whitewashing. We used a 50/50 mix of white paint and water. After painting a few bricks, we would wipe it off. It came out gray and not exactly what I was looking for.

So, off to Home Depot for some off-white paint. I think it looks much better!


If you look closely on either side of the fireplace, you can barely see the blue we will be painting the living room, kitchen and breakfast nook. There is no natural dividing line, so we are painting it all one color. After two days of rolling and jabbing at the fireplace, Jeff asked, "So when do we start painting the rest of the room?"

I'm picking up the paint tonight :-)