3.06.2012

Mr. VB Turns 40 & a Craft Brewery Tour

Last month, Mr. VB turned the big 4-0. Now, I know what you're thinking. "How did that old fart get such a young catch like me?" 

He's just lucky, I guess. :-)

To celebrate, I planned a craft brewery tour for the two of us. Microbreweries have been popping up all around St. Louis. Our favorite, Exit 6, is just down the road from our house. Jeff also just started brewing his own beer last year...


So, a tour of the local places we needed to visit was the perfect gift! Since I am a planner to the core, I mapped out our day, with notes on which places served food and snacks. We started out in South City and would end up at good ol' E6.


First up, Perennial Artisan Ales.They focus on using local, seasonal and organic ingredients...and had a fantastic tasting area.


It was also one of the few places that served food. Very. Tasty. Food. Entre (an underground restaurant in STL) serves a small, but mighty, menu onsite. So, along with our Southside Blonde and Saison De Lis, we had mac and cheese with gruyere and duck fat bread crumbs.


And, smoked pulled port tacos with pickled red onion pork tacos.


We didn't try the Strawberry Rhubarb...but, it sounds awesome!

Next up, Civil Life Brewing Company. I loved the sign they made out of old windows. They kept their pricing simple..$2.50 for 8 oz.  and $5 for 16 oz.  


Cute, cozy nook to enjoy a beer. Or read a book. If you like to do that type of thing at a bar.


Civil Life was one of the few on our list that distributes to other bars.


 They also had a great way of keeping track of your drinks...on a piece of slate in front of your space at the bar. Also, the bartender kindly drew out directions for us to our next stop.


They also had fun games, like Pin the Ring on the Bull Horn.


We tried to get a roadie at the drive-thru...


Next on the list, 4Hands Brewery.


This turned out to be one of my favorites on the list. They served beer in cute little mason jars.


Had DIY shelves from old corbels held their growlers and beer books.


Check out this beautiful table made from the original door on their building. Almost every place we visited had long tables for groups (and strangers) to sit at.


The largest brewery on the trip was Urban Chestnut Brewing Company, a one-year-old brewery located in a 1920's garage. You can find their beers in bars throughout the area.


While most of the places we visited made just 5 or 6 beers, UCBC had a long list...


I have to admit, while I did get to taste a lot of great beers during the day, the bonus for me was all of the decorating ideas. I took something away from each place we visited. Like these industrial shelves.


At the end of a long day, we were "home" at Exit 6, with a Frappuccino (a mix of E6's Vanilla Cream Ale and Founders Breakfast Stout) in hand and notes on our favorite samples from the tour. Cheers!


2.08.2012

Nook Cover Tutorial: Ahoy Matey!

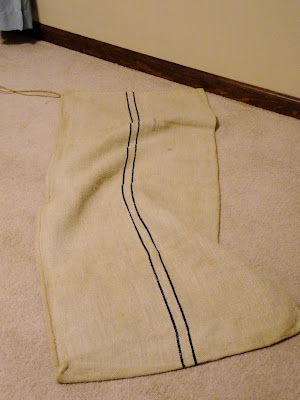
Thanks to Pinterest, my list of sewing ideas (and tips) is growing daily. For the most part, I'm drawn to purses and totes. Currently, I'm on a mission to turn this guy into a couple of bags:


Isn't he lovely? He is very thick and heavy. I hope to get at least two bags and a purse out of him. Someday, I'll sell him (and maybe his cousins) on etsy.com or maybe in my very own store.


In the meantime, I need to master my sewing skills. I tend to still bleed and curse alot when I sew. Is that normal?

I recently found this Nook tutorial by Little Birdie Secrets. I certainly can't do it justice. This was officially my first time sewing a) a zipper and b) interfacing. I'm giving myself a C.

Supplies:

Fabric for outer case
Soft fabric or cotton for inner case (I used some left over red I had)
Zipper (at least 9" long...mine was only 7". Oops.)
Iron-on stabilizer/interfacing (I used Pellon's)
Sewing machine and coordinating thread

First, I cut the outer fabric, lining fabric, and stabilizer to 7.5" x 9.5". Then I applied the interfacing to the wrong side of the outer fabric. I might have applied it the wrong way...but, I still tried.


Next, I started was was referred to as a zipper sandwich. Lay down the lining (right side up) and place the zipper at the top. Then, place the outer fabric on top of that (right side down).


Pin in place.

Sew the three pieces together. I definitely need more work at this. I'll be reviewing these zipper tips before my next project!


Top stitch along the outer edge of the fabric. Try to get it a bit straighter than mine. ;-)


Next, I sewed on the other pieces. Lay the other piece of lining fabric right-side up. Then place the side with the zipper already sewn in on top of it, with the lining against the lining piece and the right side of the outer fabric up.

Sew the three pieces as you did above and finish again with a top stitch. Hopefully, your sewing isn't getting worse at this point.


At this point, it is becoming clear to me that my zipper was too small. That's ok. I'll make it work!


Now it's time to sew the rest of it up! Unzip the zipper halfway so you have an opening to turn it right side out. Open up your pieces and fold the outer fabrics together with right-sides touching, and the lining pieces together, right-sides together. Pin around three sides, leaving the short ends of the lining open.Sew around all sides of the outer fabric. Clip corners and and trim sides and zipper so they were flush with the bag.

Turn the bag right side out and sew the lining in and put the lining inside the bag.


There you have it! A snazzy little outfit for your Nook. It helps if your Nook doesn't mind crooked lines or a zipper that is too small. Mine just happens to love that stuff.


Isn't he cute? I think I heard him say "Ahoy, matey!" last night. Or, maybe that was me, pretending to talk like a Nook. I get bored sometimes.

Happy sewing!