
Besides having a recipe clipping addiction, I also love cookbooks. I have actually been hiding some at work just so my husband doesn't know how many I have bought lately. (I am also hoping he won't read this post.)
My father-in-law retired in June and for a late retirement "celebration" I made him these cupcakes. The recipe is from one of my new cupcake cookbooks,
A Baker's Field Guide to Cupcakes by Dede Wilson. I baked, frosted and served the cupcakes all in the same day, for ultimate freshness. These have a great malted milk flavoring. The one thing I didn't like is the frosting. I've come to realize I am not a fan of confectioners' sugar frosting. So, next time, I will use a different frosting.
Malted Milk Ball Cupcakes
from A Baker's Field Guide to Cupcakes
makes 14 malted cupcakes
2 tbls. malt powder
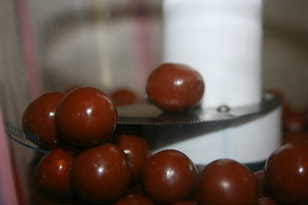
1 cup malted mild balls, such as Whoppers, finely chopped
1 batch Yellow Cupcake batter (recipe below)
1/2 batch Classic Confectioners' Sugar Frosting (recipe below)
14 whole malted milk balls
Directions
1. Preheat oven to 350 degrees. Place paper liners in cupcake tin.
2. Place malted milk balls in food processor and blend until finely chopped.
2. Thoroughly stir malt powder and 1/2 cup of malted milk balls into cupcake batter. Divide batter evenly among liners. Bake for about 18 min. or until a toothpick inserted in the center shows a few moist crumbs. Cool pans on racks for 5 min., then remove cupcakes to cooling racks to cool completely.
3. Beat remaining chopped malted milk balls into frosting. Frost cupcakes using an icing spatula or spoon. Top each cupcake with a single whole malted milk ball. Cupcakes are now ready to serve!
Yellow Cupcakes
1 1/2 cups all-purpose flour
1 1/2 tsp. baking powder
1/4 tsp. salt
1/2 cup (1 stick) unsalted butter, at room temperature and cut into pieces
3/4 cup sugar
1 1/2 tsp. vanilla extract
2 large eggs
1/2 cup milk at room temperature
Directions
1. Whisk flour, baking powder, and salt together in a small bowl to aerate and combine. Set aside.
2. In a large bowl with an electric mixer on medium-high speed, beat butter until creamy, about 2 min. Add sugar gradually, beating until light and fluffy, about 3 min, scraping down the bowl once or twice. Beat in vanilla. Beat in eggs one at a time, scraping down after each addition, allowing each egg to be absorbed before continuing. Add the flour mixture in 4 additions, alternating with the milk. Begin and end with the flour mixture, and beat briefly until smooth on low-medium speed after each addition.
3. Continue with Step 3 in the above recipe.
Classic Confectioners' Sugar Frosting
1/4 cup (1 stick) unsalted butter, at room temperature, cut into pieces
4 cups confectioners' sugar; plus an additional 1/2 cup if necessary, whisk before measuring
1/4 cup milk, at room temperature
1 tsp. vanilla extract
Directions
1. In a large bowl with an electric mixer on medium-high speed, beat butter until creamy, about 2 min. Add 1 cup confectioners' sugar gradually, beating until light and fluffy, about 3 min., scraping down the bowl once or twice. Add 1 more cup of sugar and about half of the milk and beat until smooth and creamy. Add 1 more cup of sugar and remaining milk, and beat well, scraping down sides of the bowl. Add remaining 1 cup of sugar and vanilla extract and beat on high speed until very light and creamy, about 5 min. Assess texture. If it is too soft, add a portion or all of the remaining 1/2 cup sugar.
2. At this point you can continue beating the frosting, if you like, which will make it lighter, creamier, and a little airier. You want it as smooth as possible.
3. Beat remaining chopped malted milk balls into frosting. Frost cupcakes using an icing spatula or spoon. Top each cupcake with a single whole malted milk ball. Cupcakes are now ready to serve!


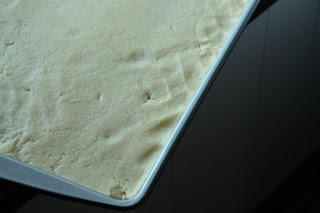


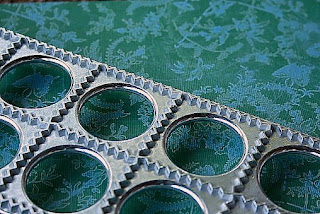 New toy
 Little Pillows of Goodness
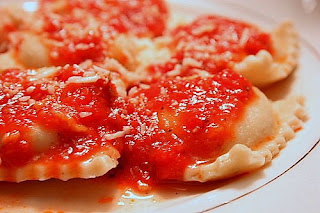


 To see more successful attempts at this, visit the


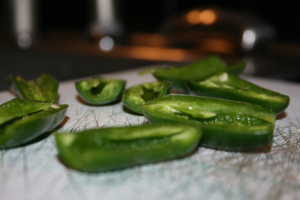
 I'm not a busy mom. But, if I was, I would use a


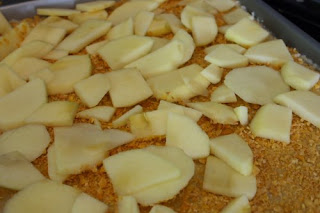
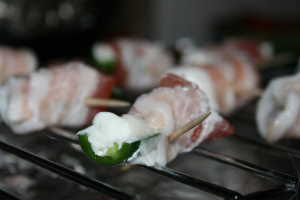 Bake at 375 degrees for 20-25 min. or until they are golden brown.
 Your first instinct is going to pop one of these little buggers into your mouth. BUT WAIT! Remove the toothpick first. Now, pop away! I don't need a lawsuit on my hands.