12.28.2009

Really Good French Toast

This recipe is not to be taken lightly -- it produces THE best French toast I have ever had. I think the recipe came from heaven. Just kidding! It is from Cook's Illustrated. But, I think they got it from heaven.

Santa was nice to Vanilla Bean this year. Which is clearly a reflection of my skillz in the kitchen. Actually, I think Vanilla Bean received more gifts than me this year. Humpf. Earning top billing is the 2009 Cook's Illustrated cookbook, a compilation of all of their magazines from this year. They take out all of the trials and tribulations for us, publishing only the best recipes and tips.


They came up with 3 key steps to perfect French toast: start with dry bread, hold the egg whites, and soak the bread properly. These simple steps produce a more custard-like French toast that is crisp on the outside and soft on the inside. Gone was the eggy flavor! I will never make French toast the same again.

Really Good French Toast
from Cook's Illustrated

8 large slices of white sandwich bread (we used challah, which was recommended in the book)
1 1/2 cups whole milk, warmed
3 large egg yolks
3 tbls. light brown sugar
1/2 tsp. ground cinnamon
2 tbls. unsalted butter, melted, plus 2 tbls. for cooking
1/4 tsp. salt
1 tbls. vanilla extract
Maple Syrup

Preheat oven to 300° F. Bake bread on wire rack until almost dry throughout (center should remain slightly moist), 8 minutes per side. Remove and let cool 5 minutes.

Whisk milk, yolks, sugar, cinnamon, 2 tbls. melted butter, salt, and vanilla. Transfer mixture to a shallow pan.


Soak bread in mixture, 20 seconds per side. Using a slotted spatula, pick up bread allowing excess to drip off, set aside; repeat with remaining slices.


Heat ½ tbls. butter in skillet over medium-low heat. Transfer 2 soaked bread slices to skillet and cook until golden brown, 3-4 minutes per side. Wipe skillet down; repeat with remaining bread.


To keep everything warm while you are making the rest of it, put the cooked pieces on a baking sheet in a 200 degree oven. Serve warm, with a mimosa, and enjoy.


12.17.2009

Pork Enchiladas with Green Sauce

I cheated on this recipe. I fully intended to make my own green sauce. But, I remembered I had bought a jar of tomatillo sauce a few weeks ago and decided to use that before I spent money on tomatillos. The Vanilla Bean Kitchen is nothing if not thrifty!

Adapted from Everyday Food

1 pork tenderloin (about 1 pound)
1 tsp. ground cumin
2 tbls. olive oil
1/2  onion, chopped
4 garlic cloves, minced
1/2 jalapeno, chopped
1 jar tomatillo sauce (I used Ortega)
1 cup of frozen corn kernels, thawed
corn tortillas (6-inch)
2 cups grated white cheddar (we used Monterey Jack)

Preheat oven to 450 degrees. Place pork on a rimmed baking sheet; rub with cumin, and season with salt and pepper. Roast, turning once, until an instant-read thermometer registers 145 degrees (about 20-25 min.). Let cool for 10 minutes; cut into chunks. Using two forks shred pork. Set aside.

To add a little depth to the tomatillo sauce, heat oil in a saucepan and add the onion and garlic. Cook until softened, about 4-6 min. Add tomatillo sauce and simmer. If it cooks down, add a little bit of water.

Wrap stacked tortillas in damp paper towels and microwave for 1 min. to soften. Spoon some tomatillo sauce on each tortilla, add some pork, corn kernels and cheese. Roll up and place seam side down in a baking dish. Top with remaining sauce and cheese. Cover dish with foil and bake until sauce is bubbling 15-20 min. Remove foil and continue baking for 15 min. Let enchiladas cool before serving.


12.14.2009

Gingersnaps

Nothing can get me blogging again quite like the holidays! Once again, I have a long list of Christmas treats on my baking list. My thighs are whining already.

After two failed attempts at fudge, I went with a sure bet...Gingersnaps. This recipe came from my Grandma and remains one of my favorite Christmas cookies. What's even better, baking them gets your kitchen smelling like the holidays. Not the fresh Christmas tree smell. The cinnamon, cloves, gingerbread smell.

3/4 cup of Crisco
1 cup of sugar
1 egg
1/4 cup of molasses
2 cups of flour
2 tsp. baking soda
1/4 tsp. salt
1 tsp. each of cinnamon, ginger, and cloves

Cream the first three ingredients. Slowly add the remaining ingredients. Roll into balls and roll in sugar. Get in the Christmas spirit and add some red and green sugar in there too. Bake at 375 degrees for 12 minutes.

To keep them soft, my Grandma would put a piece of bread with the gingersnaps in the jar or container. Or, I could be making that part up. I do that sometimes.


10.22.2009

Recycled Window Turned Chalkboard

I'm not immune to the whole chalkboard craze. And, I can see how it can be a little addicting. First, I did this old, weathered window I picked up at a local antique store for $30.


I liked the little ledge on this window...perfect to put little candles and knick-knacks on. I tore off the quilt that was on the back and removed the hook that was in the upper corner. I used the chalkboard paint you brush on (I couldn't find the spraycan version). Here's the finished product:


Since then, I've been eyeing up all sorts of things around the house. Next on the list is to create wine glasses like these from Pier 1:


What chalkboard projects have you done or seen around???

10.20.2009

I. Hate. Painting.


And, most of all, I hate painting the same thing 4 times. Or was it 5? I lost count. With the exception of drawer pulls, the cabinets are finally done! We didn't sand them and used a coat of Kilz as a primer. Followed by another 3 or 4 coats. With 22 doors to paint, we had to set up a work station in the basement and could only paint half at one time. As of last night, all the doors were finally done! Now we are in search of some pulls. I'll post some better pics soon, but here's the before:


And after:


We decided to leave the doors off of two cabinets to make open shelves for some of our cookbooks. I'm thinking of painting the back of the cabinet walls blue to add a little contrast.

10.09.2009

No Turning Back Now!

What's done is done. The Housewarming Party evites went out and we have alot to do before the 25th! Our main objective will be making some big improvements in the kitchen, in addition to putting some final touches in the breakfast area and living room. Here's the list we are working on: 

1. Paint the cabinets white
2. Add new pulls
3. Update with stainless steel appliances (stove and refridgerator)
4. Put beadboard on the island
5. Spruce up the dishwasher until we can put in a stainless one

Our goal is to turn this:


Into this:


I love the stainless steel farmer's sink (might be a little pricey, though). The countertops and backsplash are in the next phase of the project. We are thinking of tiles similar to these (not all the way up to the ceiling, though) and removing the wall cabinets and putting up shelves.

Here are some more kitchens I'm using for inspiration:


Keep your fingers crossed and hopefully I'll have some pics to show on Monday!

10.07.2009

Breakfast Nook Wall -- Help!


Things are just about wrapped up in the breakfast area. I just feel that the back wall is missing something. I asked Jeff to build me a shelf to hold some cookbooks. Here is what I had in mind:


Jeff thought more than one shelf would get in the way, so this is what we came up with:


Anyone out there have any thoughts or inspiration to send my way? It still feels a little bare!! Help!


10.06.2009

TWD: Split Level Pudding (or A Tale of Two Puddings)

"Your chocolate isn't all flowy like hers." ~ Jeff
"I know that." ~ Me
"It doesn't suck." ~ Jeff

That basically sums up this week's Tuesdays with Dorie recipe, Split Level Pudding. Thanks to Garrett of Flavor of Vanilla on the selection.

For whatever reason, I didn't wind up with two creamy layers of pudding. I ended up with more of a vanilla custard on a bed of hard chocolate. When I made this, I thought Dorie grossly underestimated the amount of chocolate pudding (ganache). The chocolate layer was only enough to fill two of my ramekins. You want something you can sink your spoon into, right? Or, in my case, something that brings your spoon to a halt.

The chocolate ganache couldn't have been easier. Boil some heavy cream. Pour over chopped bittersweet chocolate. Stir. Here it is looking all ganachey:


The vanilla layer was a bit more of a pain to produce. Am I the only one who found it a bit weird to put pudding in the food processor? Does this look appetizing?


I chilled it for 4 hours, shaved some chocolate on top, and thought, "This doesn't look too bad." However, after diving in, I found the bottom, chocolate layer was completely hard. There was no flowing of the two levels like in Dorie's photo. No creamy, silky layers I had been thinking about for the past 4 hours. I begrudgingly ate a few bites for the photo op and returned it to the fridge.


10.04.2009

Halloween Decor Quickie

I didn' t want the weekend to go by without showing a super quick project I just finished. One of my favorite bloggers, Centsational Girl, recently introduced me to the wonders of this guy:


I grabbed a couple of my clear votive candle holders, a few scrapbooking stickers, and went to work. It is very subtle, but if you look closely, you will see a "31" and "boo!".

9.25.2009

Teeny Tiny Potatoes (and other stuff)

You know when you see something and you just have to have it? It doesn't matter if you'll never use it. Or, in my case, you are cutting it out of your diet. It must be yours.

That's how it was when I spotted these: Teeny Tiny Potatoes at Trader Joe's. I actually cooed at them like they were a baby. If potatoes had cheeks, I would have pinched them. I had to have them. I wasn't going to eat them, but there was bound to be somebody at the house who would. In the very least, I could peek at them in the pantry every so often and think how cute they are.

As it turns out, they went perfectly with the Pork Chops with Apples and Thyme I had planned for dinner. Jeff thought they were just as cute as I did and gobble them up.

Pork Chops with Apples and Thyme
From Yahoo Foods
3/4 cup reduced-sodium chicken broth, divided
2 teaspoons cornstarch
2 teaspoons canola oil
4 (4 ounce) boneless pork chops, 1/2 inch thick, trimmed of fat
1 small onion, sliced
1 tart apple, such as Granny Smith, peeled and sliced
1/4 cup apple cider or apple juice
2 teaspoons Dijon mustard
1/4 teaspoon dried thyme

1) Mix 2 tablespoons broth and cornstarch in a small bowl.

2) Heat oil in a large nonstick skillet over high heat. Add chops and cook until browned, 2 to 3 minutes per side. Transfer to a plate.

3) Reduce heat to medium-high and add onion to the pan. Cook, stirring often, until it starts to soften and brown, 2 to 3 minutes. Add apple and cook, stirring often, until tender, 3 to 5 minutes. Stir in the remaining broth, cider (or juice), mustard, thyme and the cornstarch mixture. Bring to a boil, stirring, until thickened and glossy, about 1 minute. Return the chops to the pan and heat through. Serve immediately.

9.24.2009

Breakfast Room Updates

We are almost done with the Vanilla Bean breakfast room. I am hoping that by this time next week, I'll have a new place to eat my Wheaties. Just kidding. I don't eat Wheaties. I'm a Frosted Mini-Spooners girl.

Table & Chairs Before


Chairs During


After


The process: The chairs were first sanded down and got about 3 layers of white paint. I distressed the edges with my palm sander and then went back over the exposed wood with a Q-tip dipped in dark wood stain (I wiped it off soon after it was applied). It really brought out the distressing detail.

The table was a bit more work. When we first brought the table home, we discovered it was too short and we couldn't get out legs under when sitting down. So, if you look closely at the bottom of the legs, you will see how we heightened the table (by we, I mean Jeff). He did a great job blending it all in and you can't even tell!

I didn't sand off the exisiting green paint. Just painted on about 3 coats and used the same techniques as I did on the chairs.


Also, it's DIY Day at A Soft Place to Land...check it out for more projects!

9.23.2009

The Secret Life of a Cushion

We all do it. You know you do. You say you just want to update the look of your dining room. Maybe add a little color to your breakfast nook. So, you head on down the the local fabric store and pick up a couple of yards. Maybe you'll go with a bold pattern this time. Or, get in on the burlap craze.

I'm talking about recovering a chair cushion. An easy, affordable way to change the look of your chairs. Some of us are able to control this urge. Then, there are others that need an intervention.

With this in mind, I give you Exhibit A:


Looks harmless, right? Four of these chairs were given to us. I liked the curves of the legs and back and thought they would be great in our breakfast room. I got most of the paint sanded off. Repainted them. Distressed them. Then, it was time to work on that seat cover. My plan was to strip down the seat cushion, put a simple piece of fabric on it, and buy a couple of cushions to put on top of that. I picked up some super cute ones at Pier One (this is the pattern...the shape of mine are a bit different).
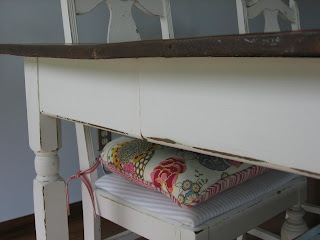
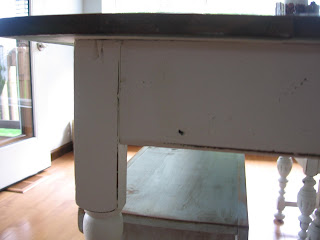
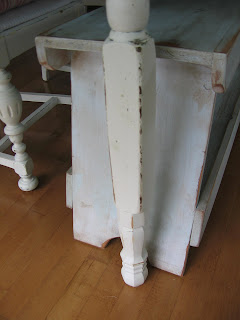
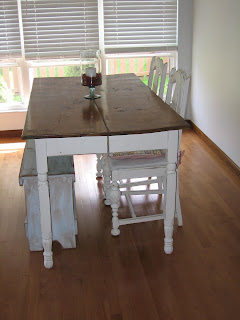
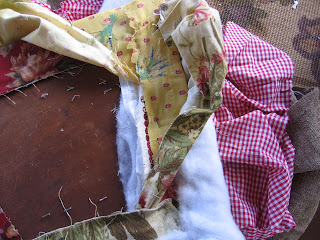
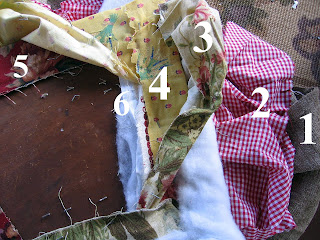
First up, stripping off that brown fabric. That was easier said than done.

Which brings me to Exhibit B:


You might find it difficult to see the many layers of this seat. So, let me break it down for you.


And, it doesn't stop there. I got down to the "last layer", layer 6. A sweet, light blue striped fabric that goes perfectly with our walls and the cushions I picked for the chairs. But, upon further inspection (I didn't want to rip the striped fabric) I noticed there were at least three more layers. Possibly a fourth. For a grand total of 10 layers of fabric. And approximately 10 thousand staples.

Because the gifter of these chairs thought there were only two layers of fabric, an intervention in this case is clearly beyond my control. Clearly, someone before her had an addiction to recovering chairs. What gets me the most is, why, after 10 transformation was it decided that these chairs should be given up on? What was it that caused this person to toss them aside? Perhaps purchase new ones? I will never know. But, as they say, one person's trash is another's treasure!